Image Map

Sunday, November 27, 2011

Pumpkins and paper...


So. That pumpkin pie I was so eager about? Well, unless it's meant to be mushy and incur the gag reflex, I don't think I can say it was a success. But hey ho, you live and learn...and I've learnt to let someone else make it next time. But it does mean that I still can't form a judgement on it because I'm pretty sure what I ate yesterday would not be recognised as a pumpkin pie. Which is a shame because I was hoping to finally decide whether I was justified in thinking putting veg in a pudding is just a bit weird. I'm pretty particular about what counts as sweet and what is savoury...and I really don't like mixing the two up (call me old-fashioned!).
But a couple of years ago an American friend of mine force fed me sweet potato with marshmallows cooked on top (I'm sorry...but what?!!) and planted a seed of doubt in my mind because it was actually...ok.

On the flip side though, I had tons of pumpkin left over so I decided to try another recipe which was deeelicious...so I'll share it later this week!

This weekend I finally got round to making a magnetic notepad for our fridge. It's been a long time coming because I always think of things I need when cooking and then forget them when it comes to making a list for shopping...so now I can just jot it down as I think of it! Maybe you already have one...or perhaps your memory is not failing you at age 25...but it looks pretty and here's how it is made:

What you need:
Multiple sheets of A4 paper (1 sheet will yield 3 sheets for the pad)
Craft card
Twine/ribbon
6x11cm material
Hole punch
Pencil
Scissors/guillotine
Glue
Magnet

1) Cut the A4 sheets of paper into 3 equal sections. Use a hole punch to punch holes into one of the narrow sides of the paper sections.


2) Next secure the paper together by threading the twine through both holes, overlapping and threading back through to the front.


3) Next fold the material in half lengthwise and slot paper in the middle. Using a pencil, lightly mark where the twine will be fed through. Cut a small slit at each marking and feed the twine through, securing in a bow (By making it undo-able you can top up the paper when you run out!)


4) Cut a 22x13cm piece of craft card/paper.

5) Spread glue evenly over the back of the paper pad, including fabric. Place in the middle of the backing and firmly secure back of pad to the backing.


6) One final simple step, and thats to magnetise your pad! I cut an adhesive magnet to the right size. Otherwise glue a magnet to the back of the backing. Because I used quite thin craft paper i found the bottom slightly curled up when the glue dried...easily solved by adding a thin magnetic strip at the bottom of the backing.


Since making this I already want to replace it with a driftwood backing...I think that would be sooo pretty :)


Friday, November 25, 2011

It's Friiiiidaaaay!

Ah the weekend is here! It's most definately time to sit back and relax after a busy few weeks - and perhaps begin some christmas shopping?! After all, it is only one month to Christmas...  There will be no daily countdown on this blog but I can't promise the absence of mildly increasing panic as the date draws closer and I've still yet to buy any presents!

A belated happy Thanksgiving to any American readers, I hope you had a wonderful day with your friends and family. I have just put my first ever pumpkin pie in the oven to bake...if I had realised I would have made it yesterday in a nod to your holiday :)

I thought I'd share with you some of the gorgeous products we've got in the shop at the moment. I'm always drawn to hearts when buying for the home and I love to buy them as gifts. If you're like me then you might love these beautiful heart-related items we have in the shop at the moment. Click here for more details.


Happy weekend to you all, have a great one!

Monday, November 21, 2011

Shining star...


I will never forget the night when I stood with my friends in [what felt like] the middle of nowhere in France and was enchanted by a sky so full of shooting stars it looked like it would burst. So beautiful...I had seen a lot of stars before but never anything like that. Stars are so captivating and I love star decorations but they do seem to get trapped into being just for the christmas season (and I'm not quite ready to start christmas crafts quite yet!).  I saw this pretty papercraft design and realised that I had found the perfect all year round star decoration :) (although there's nothing to stop you from using festive paper if you're in the christmas mood already)

On a side note, a couple of people mentioned to me over the weekend that they hadn't been able to comment on the blog. As I'm a complete newbie at blogging I hadn't realised that I had to change the settings. I've changed them now so everyone should be able to comment...I'd love to hear how you get on with the crafts.

Paper star

What you need:

6 squares of craft paper
Good quality sellotape
Scissors
Stapler
Ruler/measuring tape
Hole puncher
Ribbon/Twine
(do you like how I always forget to include at least one thing in the photo?!)

1) Choose your craft paper and cut into 6 squares of 6" x 6". Fold into triangles.


2) Take one triangle and mark out from both sides 1", 2" and 3". Cut in to create 3 'almost' triangles - make sure you stop before the lines meet! Repeat for all 6 triangles.


3) Open out the triangle back into a square...it should look like this:


Pull the points of the two smallest triangles together and tape to together.


Repeat on alternate sides:


Repeat with the remaining triangles:


4) Now time for the stapler...the original tutorial suggests stapling all the six pieces together at the centre however my stapler was not large enough or strong enough. So I stapled a pair together at the centre and then attached the three pairs by stapling the external swirls together on both sides. Our camera is really playing up with close ups (amongst many other things!) so I had to crop a picture to try to demonstrate the second part...hopefully you get the idea!


5) Finally, using the hole punch, make a hole at the top of one of the sections and thread a ribbon through.


And then hang your pretty shining star wherever you fancy. I saw a great tip for hanging wreaths etc by placing a door hook upside down on the opposite side of the door...and the simply loop the ribbon round...genius!


Thursday, November 17, 2011

Light up my life...

Source

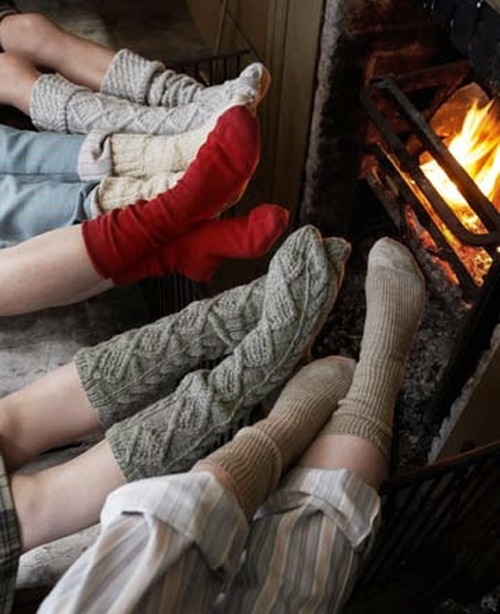
Close the door, pull on your cosy knits and snuggle down with a good book because winter is here.
Either that or wrap up warm and track down some beautiful lights...I would love to be walking down this street right now.

Source


Or maybe snuggled up in this bed, the fairy lights and tree are sooo pretty :)


Source
I thought I'd share with you some beautiful lights that I found around Pinterest. I'm slightly in love with soft lighting so here are some ideas that you might like to try:


Sources: 1. 2. 3. 4. 5. 6.


 And here are some beautiful craft ideas, including a gorgeous tulle light and D.I.Y wax candle holder...I think those two are my favourite although I'm loving the teacup candles as a gift idea:
 

  Sources 1. 2. 3. 4. 5.

Although I think it's always good to know when to stop...


(I would not want to be receiving that electricity bill!) 


Sunday, November 13, 2011

Making a house a home...

So it's been an exciting weekend in the world of Hannah...I went to see Switchfoot in Cambridge (amazing), catch up with old friends (also amazing), have a great chat with a 76 year old ex-jockey in Newmarket (hi Alfie, sorry I was so rubbish on the horse simulator), bake brownies (delicious), decide what to do with a donated beetroot and pumpkin (I'm thinking soup and pie)...and make a pretty heart garland to adorn our stairs! Some of this was planned, other parts, i.e. the horse simulator, were more of a surprise...and just plain random :)

We've lived in our little home for just over a year now and I love it so much. It's actually part of a converted mental asylum (un-p.c. I know, but it really was built to be an 'asylum' rather than hospital) which means it has gorgeous stonework and vaulted ceilings. But we've been pretty rubbish at getting round to those 'little touches' which finishes of the home. It's partly because we know we're only going to be here short term but it's mostly due to my inability to get round to things. I've been kicked into action after going round to our friends and seeing how lovely they've made their home...after only living there for one month.

So I decided to make a start on Sunday and make a heart garland. It's something I've been meaning to do since picking up some pretty craft paper in hobbycraft. And best of all? It took no time at all. Oh, actually, best of all was getting to peel off the glue from my fingers...it took me right back to primary school!

What you need:

Craft paper
Thin cardboard
Twine
PVA glue
Paint brush
Scissors
Pencil

1) Sketch two heart shapes (2 sizes) on to the cardboard and cut out to create your templates

2) Using your templates, draw out the hearts onto the reverse of the craft paper and cut out. Tip: Reverse the template when drawing on the second piece of craft paper to ensure a neat match when sticking them together.

3) Using the paintbrush, apply a thin layer of glue to the reverse of two of the hearts. Lie one onto the surface and position the twine down the centre. Apply the second heart and firmly push together. It's really up to you as to how much space you'd like between the hearts. A strand of 11 hearts with 6cm gap between hearts makes approximately a 4ft garland.


4) Next trim the twine (leaving enough to tie/secure the garland) and any uneven sides of the hearts. And then choose where you'd like to prettify.


Maybe a short strand to adorn a cupboard?


Or a longer strand for elsewhere?

I decided on the stairs.

Wherever you decide, let me know how you get on :) Right I'm off to massacre the above mentioned pumpkin in my attempt to make pumpkin puree for a pumpkin pie.

Friday, November 11, 2011

We remember...

For the fallen

They shall grow not old, as we that are left grow old:
Age shall not weary them, nor the years condemn.
At the going down of the sun and in the morning
We will remember them

By Lawrence Binyon


Source


"Love each other in the same way I have loved you. There is no greater love than to lay down one’s life for one’s friends" (John 15 v 12-13).

Thank you to all who have laid down their lives so that we may know freedom today, we remember you.

Wednesday, November 9, 2011

Let's get sewing...

About 6 months ago I finally got a sewing machine. It's something I have thought about for years but have never lived anywhere with enough storage space to justify buying one. However, now I have a home waiting to be filled with wonderful and pretty and badly stitched  things so I felt that was the perfect excuse to buy one. 6 months on and I have only so far made a laundry bag and some cute bunting for my niece...although I have done very well at accumulating numerous pieces of material (why is it I'm so good at doing anything that involves cluttering our home?)

I have been reminded lately of how drafty our house was last winter so I decided to make a...


Beard warmer? Also known as a draught excluder. I had a look up on google to see how people made them and couldn't believe it when I found a designer draught excluder being sold for over £100 -eek! This is much much cheaper...and the fabric is so much nicer. Anyway, I started to use a pattern but it wouldn't have been very chunky (surely an essential element of being a draught excluder)...so here's my version...


What you need:

Measuring tape
Chosen fabric
Scissors
Iron
Thread
Sewing pins
Needle
Sewing machine
Some form of stuffing: I used hollowfibre filling but have seen rice, polystyrene balls and cat litter also recommended
Tea (optional)

1) Before measuring the fabric, iron it to remove any creases.

2) Measure the width of your doorway. Next, cut the fabric to 13" wide x length of the doorway + 2" (mine was 36"). I don't have a rotary cutter, so to ensure a straight line I marked the fabric with a dressmakers pencil at regular intervals.


3) Fold the fabric in half length ways with the right sides facing. Pin together along the edges.


4) And now sew, sew, sew away! Don't forget to backstitch to secure the thread. Sew first along the length of the open side with a 1/4" seam. In the middle leave a gap large enough to be able to fill the tube (about 5"). Then sew the short sides as well.


Here's mousey at work
5) Now you need to turn the tube the right way out and fill it with the stuffing.


6) Now to secure the opening. I pulled out my trusty martha stewart book and looked up how to slip stitch.


Slip stitch is great to use when wanting to make an invisible seam...exactly what we want to do here. First secure the thread with a back stitch and use a slip stitch to secure the opening.


Pull the thread tight and secure again with a back stitch.


Then place by chosen door and enjoy many cosy nights in, free from draughts :)
Related Posts Plugin for WordPress, Blogger...