Image Map

Tuesday, December 25, 2012

Thursday, December 20, 2012

<a href="http://www.bloglovin.com/blog/4422371/?claim=gfsaq5mkzec">Follow my blog with Bloglovin</a>

Peg it...

Christmas appears to be sending me into a mini blogathon but it's just as well because there will probably be a long silence after Christmas as I recover from chocolate overload see lots of lovely family. It's only 5 days away now folks!

I'm a complete sucker for anything miniature so when I saw these mini pegs I couldn't resist buying them! I originally thought about doing something similar to this but decided to save them for Christmas instead. So if you're running out of space for all those Christmas cards these are a cute way to hang them!


For the super thick glitter pegs, I painted on glue and then dipped (and re-dipped) in glitter.

For the more subtle glitter pegs I used glitter glue.

And for the stripes i just painted on glue in stripes and then dipped gently in glitter.

So easy and quick...and an excuse to get the glitter out again!

Wednesday, December 19, 2012

Cinnamon sugar biscuits...

This year we're planning on giving out homemade sweets (I'm hoping my family don't make it on  here to read this before Christmas!) so I spent this morning playing in the kitchen trying out various sweet recipes. My husband was in truffle heaven as he was the official taste tester for each flavour (I was the official 'lick the bowl'er). Candied citrus peel = fail but honeycomb truffle = amazing! It 's the first time I have ever made honeycomb, I can't believe how simple it was - I used this recipe if you're interested in trying it out yourself. I'll share the truffle recipe once I have perfected it :)

Whilst I don't have any truffle recipes to share yet, I had to share these delicious biscuits from Cake Days. I had never heard of snickerdoodles but they are full of cinnamony cakey goodness. These are going to be on hand for our night of present wrapping.


Ingredients:
60g unsalted butter
160g caster sugar
1/4tsp vanilla essence
1 large egg
240g plain flour
3/4tsp cream of tartar
1/2tsp bicarbonate of soda
1/8tsp salt
1/4tsp ground cinnamon

For coating:
1 1/2tbsp caster sugar
1tbsp ground cinnamon


Method:

1) In a large bowl, cream together the butter and sugar until light and fluffy.Add the egg and vanilla essence, mixing until well combined.

2)Sift together the remaining ingredients and gradually add to the mixture until the dough comes together, forming a smooth ball. Place in bowl, cover with clingfilm and chill for 40 minutes.

3) Preheat the oven to 170 degrees celcius (325 F) and line two baking sheets.

4) Mix together the sugar and cinnamon for the coating. Break off walnut-sized pieces of dough, roll in the coating and place on the baking sheet. I found these didn't spread much during baking so flatten slightly with the palm of your hand.

5) Bake until they are light golden, approximately 10-15 minutes. Leave to cool for 5 minutes and then transfer to a wire rack to cool completely.

Enjoy!

Monday, December 17, 2012

Decorated hanging jars...

Sometimes I survey my magpie nest hoard and wonder how my husband puts up with my ever growing 'it might come in useful' pile. I love to think that I will somehow find a pretty and lovely use for nearly anything. One of these things are jars. oh jars, I love you. I want to paint you, fill you with candle wax, put flowers in you...and even hang you up in my garden.


Every now and again I'll try to cleanse my hoard but I can never throw jars away...they have so much potential and there's far too many pretty ideas on Pinterest. Here's a few ideas of how to make your own hanging jars...these are currently in my lounge but I can't wait until summer so that I can use them outside for those late night Summer barbecues :)


I used 0.8mm wire because that is what I had to hand. It wasn't as strong as I would have liked so I simply doubled the wire in the handle. If you have stronger wire then skip step 1 and just cut the length of wire you would like for the handle + 4cm.

1) Firstly measure how long you would like the handle to be, then cut double this length + a little extra (approx 4cm) of wire. Bend the wire in half.


2) Next you need to create an 'eye' at each end of the wire. To do this, take one end of the wire and bend 2cm at 90 degrees  (using flat-nosed pliers). Next, using round-nosed pliers, create a loop - starting at the end of the wire and working into the bend.


3) Now feed both ends of this wire onto the remaining wire and position around the top of the jar. Wrap the wire repeatedly around the top of the jar. Once secure, twist the wire around itself and, after trimming the ends of the wire, flatten the ends against the jar.


You could leave it plain...but it's fun decorating these up!


I love it paired with lace and ribbon...


To attach, I simply cut the length required and added a thin line of strong glue to hold the lace in place - secure with tape until dry. Then tie a pretty bow...my mum taught me how to tie the perfect bow when I was making my wedding invitations - it would seem tying 100 bows with this method wasn't enough repetition to embed it in my memory!

We've got a bit of a red and gold thing going on here for Christmas so I thought I'd make a jar to match...


For this I wrapped gold raffia (left over from the hanging stars) around the handle before threading the handle onto the base wire. Then I added some extra raffia to hide the wire and secured with a knot.

Then I got a bit bored with wire so I decided to have a go with twine.


For this, simply tie a strand of twine tightly around the top of the jar. Loop over the top and feed under the twine wrapped around the jar. Secure with a knot and trim the excess twine.


For the fourth, I just really wanted to use some of the cute Christmas ribbon I had lying around. For this, and the red and gold jar, I decided to just use a little sellotape to secure the ribbon so that I had the choice to change them after the Christmas season had passed!

I think these would make really lovely gifts, so if you're running out of time (like me, how is Christmas only a week away?!) then this is a really simple but pretty present idea.

Note: the wire handles get very hot when a tealight is lit in the jar and it is not recommended to light a candle in jar if hanging with twine or paper wrapped wire as these present a fire risk.

Happy Monday!

Monday, December 10, 2012

d.i.y. hanging stars...


When I first started making these I wasn't sure what I was going to do with them...maybe decorations for our Christmas tree or a window decoration. Then we put our decorations up and there was a perfect gap for these pretty little stars to fill in our lounge...so our hanging stars were born.


All these take are a little patience, time and background Christmas music. I initially started making these free hand but decided that, unless I was going for an abstract piece of art, it might be better to use a template. I found my template by just googling 'star template'.


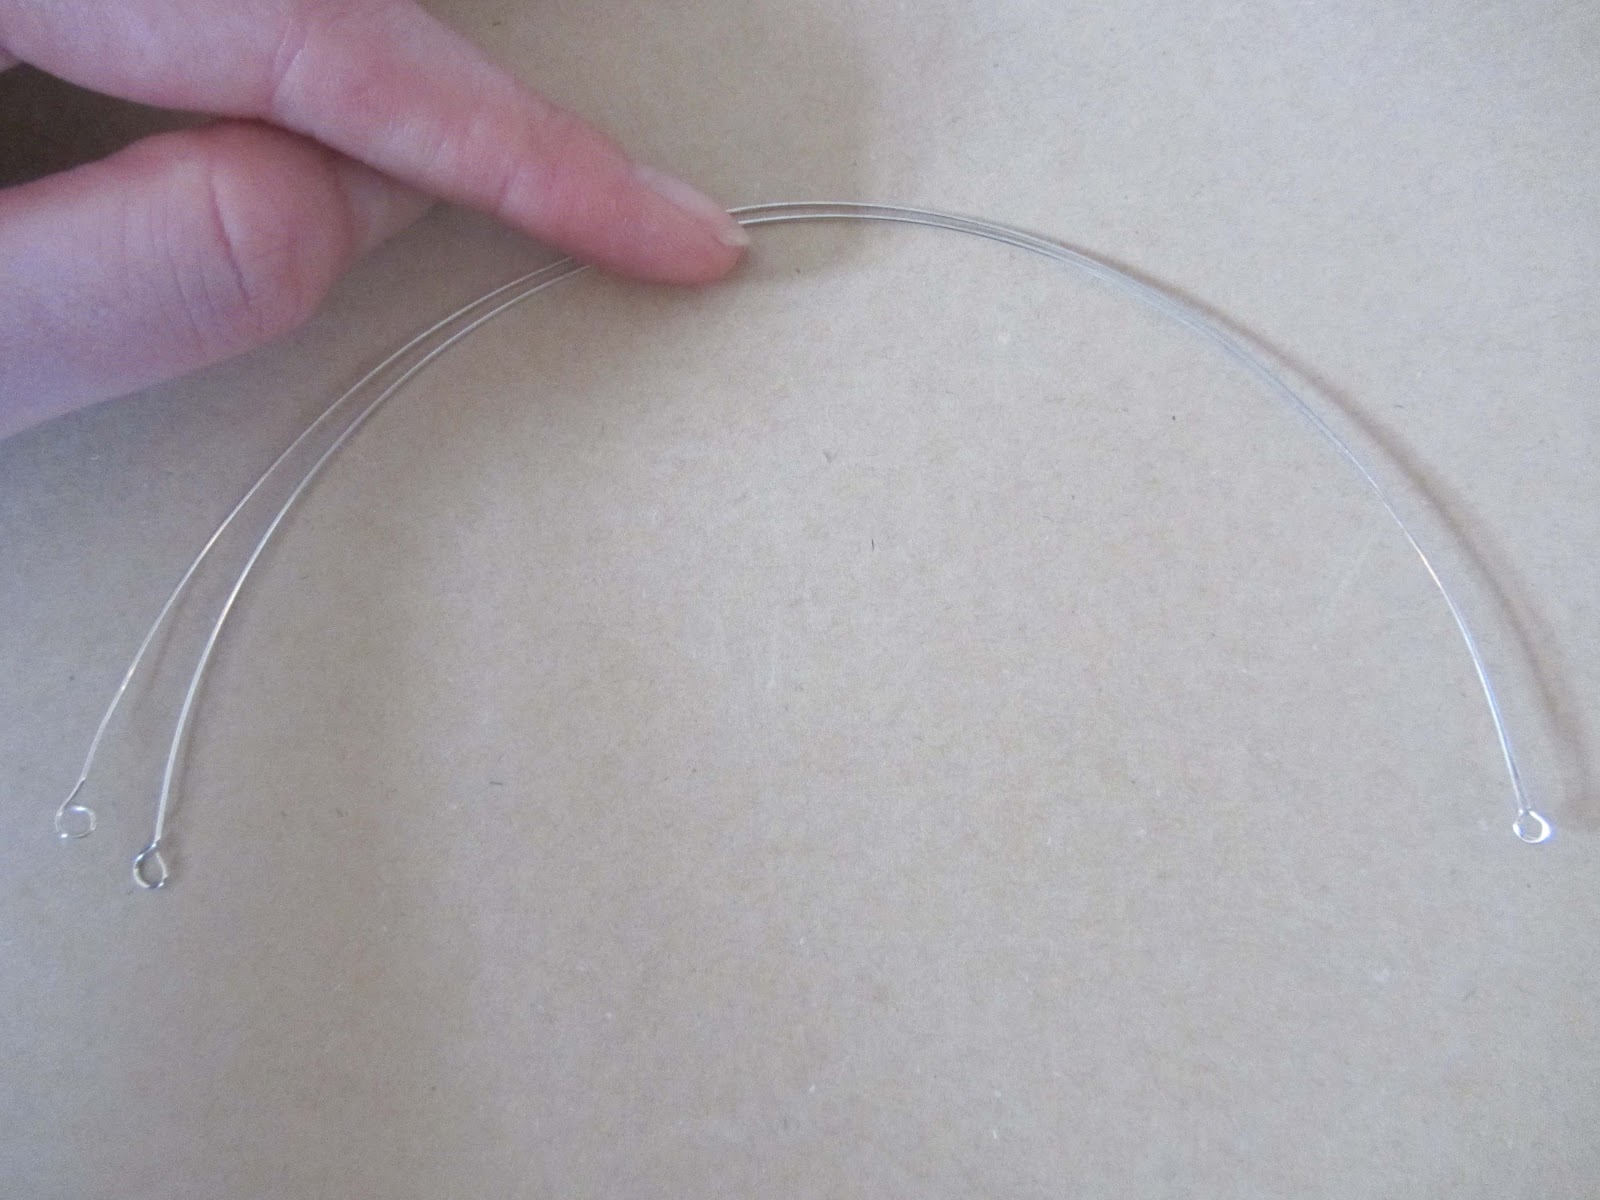
I used 0.8mm wire, it was malleable but held it's shape well. For hanging the stars I used a large twig from a tree in our garden and thin thread.

1) Take the template and begin to shape the wire around the printed star. Use the flat-nosed pliers to bend the wire to help give defined points on the star, you can then adjust it to the right angle by hand. Any accidental bends or kinks in the wire can be easily straightened out with the pliers.


2) Continue around the whole of the star and overlap the ends by approximately 5cm. Either by hand or with the pliers, wrap the wire around the side of the star to secure. Trim any excess wire and use the flat-nosed pliers to flatten the end of the wire tightly to the star.


note: you may find this technique slightly distorts the star shape. If you experience this then you can also use the technique I used in the geometric earring tutorial (see step 3). I used both techniques while making the stars and both worked well.

Repeat until you have as many stars as you wish! I made 3 different sizes to add variety.


Now the fun begins...it's time to decorate! I would love to hear how you decide to decorate your stars. I'll share with you what I decided to do.


To make this star, simply wrap a strand of raffia around the wire template, securing with a knot.


For the woven stars, simply choose an embroidery thread, secure with a knot, and wrap repeatedly around the star, making sure the thread is kept taught. Once you've finished simply secure with another knot, and trim the excess thread.

Before I decided on using raffia and embroidery thread, I had also added glitter to some of the stars. I decided not use these in the end because they clashed with the gold of the raffia and thread. But to make glitter stars simply pour some glitter onto a plate, generously brush glue onto the star and then dip into the glitter. Leave to dry and then dip again into the glue to seal in the glitter - unless you want to wear glitter every time you touch them :)


To decorate the branch I wrapped a gold sewing thread repeatedly along the branch.


I used the same thread to hang the stars as I didn't want the threads to be obvious.


I love our new addition to our Christmas decorations!

Happy Monday :)

Friday, December 7, 2012

Sharing the love...Blaise Paisel

I don't normally post about music but I just had to drop this post in to tell you to watch my friend's band's debut music video, Magical. The song was already amazing but the video just took it to a whole new level for me. I grew up with Alie and wish I could be closer  to go and see them play live more often - if you live in Kent check out their facebook page for dates.

Now I don't normally boss you around but seriously watch it now! Look I've even put it in the post so you don't have to go search for it...


Happy Friday!

Monday, December 3, 2012

Make your own essential oil {the easy way}...

Now it's December the Christmas tunes are filling our home non-stop. I normally try to hold off putting up decorations until later into the month but this year I'm already itching to put our tree up. I love the smells of Christmas (is that a weird thing to say?)- mulled wine, pine, mince pies....and spiced orange. I've fancied having a go at making essential oil for a little while. Since Christmas is an event to hit every one of the senses, I thought making a spiced orange oil would be the perfect place to start.


When I looked into how to make essential oil I discovered there's a lot more to it than I thought...so I decided to just go with my instincts. This is definitely not a guide to making 'real' essential oil but it is a much easier method.

How to make Spiced Orange essential oil


What you need:
Jar
Extra virgin olive oil
2 oranges
Spices (such as cinnamon, cloves, star anise)
Small bottle or jar (I used an old food colouring bottle)

1) Fill the jar 1/3 of the way with the olive oil

2) Add 2 cinnamon sticks, 20 cloves and 3 star anise (this is what I did but obviously you can add whatever you like)

3) Peel the skin of 2 oranges and add to the jar


4) Press the orange and spices into the jar and shake well.

5) Store in a dark place for seven days, shaking the jar each day. 

6) Pour the oil through either a fine sieve or cheesecloth and transfer to your bottle.

This isn't as strong as shop bought oil but it still smells great! Have fun making your own essential oil...let me know what you decide to make!

Happy Monday :)

Tuesday, November 20, 2012

Jewellery gift ideas part 7 - beaded hoop earrings


Unique jewellery is such a lovely gift and it's even more meaningful when you have put the time and effort into making it yourself. I love making and receiving handmade gifts, so I thought I would put together a mini series which will hopefully inspire you to whip out your jewellery stash and get creating!

The beauty of each of these ideas is that they are so versatile - you could either make them just as I suggest or simply use each of the tutorials as a springboard to that perfect gift.

Already made: Vintage inspired pearl and ribbon necklacebeaded pendant necklacewoven earrings, teardrop necklaceribbon wrapped comb

                                                                      ...................................................................................................................

So it really does not matter that I don't have any step by step photos of this. Mainly because there are only two steps...and they're pretty self explanatory - sometimes I feel that I'm just not needed - sob!


It's always fun to bring a bit of colour to your earlobes and these are an easy way to pack a whole lot of colour onto one pair earrings!


So quite simply open your hoop findings and add your beads. Close the hoop and use the flat nosed pliers to attach the hoop to the earring.

and...that's it.

I feel I need to make up something because that was too simple. But I like you so I won't.

Happy beading!


Monday, November 19, 2012

Jewellery gift ideas part 6 - tassel necklace


Unique jewellery is such a lovely gift and it's even more meaningful when you have put the time and effort into making it yourself. I love making and receiving handmade gifts, so I thought I would put together a mini series which will hopefully inspire you to whip out your jewellery stash and get creating!

The beauty of each of these ideas is that they are so versatile - you could either make them just as I suggest or simply use each of the tutorials as a springboard to that perfect gift.

Already made: Vintage inspired pearl and ribbon necklacebeaded pendant necklacewoven earrings, teardrop necklace, ribbon wrapped comb

                                                                      ...................................................................................................................


I have a confession - I forgot to take photos of the steps for both this and the next gift idea. I have another confession - I considered recreating them but I'm writing this on a Saturday morning and I'm really enjoying just looking at this, this and definitely this. I promise I would take photos again if it was tricky but it's really not!


This necklace is lovely even without the tassel - so if your friend isn't a tassel fan then make a few of these necklaces in different colours to give as a set! But I think it adds a fun dimension and I'm always up for a bringing a little fun into my wardrobe!

The easiest way to make the tassel would be to use thread. However, I had this fabric which I loved the colour of, so I spent a little time pulling it apart. If you want to use a fabric then simply pull the threads which are parallel to an edge. (it's surprisingly therapeutic!)


1) For the necklace, cut a length of beading wire that is long enough to slip over your head.

2) Squash a crimp onto one end of the beading wire (approx. 4 cm from the end) and thread on your beads. Stop threading on those beautiful beads about 5 cm from the end.

3) Thread on another crimp and pull the other end of the wire through the crimp as well. Squash the crimp to secure the necklace and trim any excess wire.

4) For the tassel, take your threads and bunch together. Double it over. Taking a piece of wire (you won't need more than 10 cm) add a feature bead and then wrap the wire around the thread.


5) . Cut off any excess wire and flatten the ends into the tassel. Trim the thread to the length you like.

6) Loop a jump ring through the head of the tassel and add another jump ring. Add this jump ring to the middle of the necklace.


All done! Say if anything is not clear or if you would like step by step photos and I'll put some together.

Happy Monday!

Friday, November 16, 2012

Jewellery gift ideas part 5 - ribbon wrapped comb

Unique jewellery is such a lovely gift and it's even more meaningful when you have put the time and effort into making it yourself. I love making and receiving handmade gifts, so I thought I would put together a mini series which will hopefully inspire you to whip out your jewellery stash and get creating!

The beauty of each of these ideas is that they are so versatile - you could either make them just as I suggest or simply use each of the tutorials as a springboard to that perfect gift.

Already made: Vintage inspired pearl and ribbon necklace, beaded pendant necklace, woven earrings, teardrop necklace
                               ....................................................................................................................

You can never have too many pretty things to put in your hair. This ribbon wrapped comb is so versatile, and if you get bored with the colours you could just unwrap it and do it again in different colours!


1) Simply take your selection of ribbon and wrap around the comb a few times to secure and conceal the end. Continue to wrap around the comb in whatever pattern you fancy :) I laid the narrower piece of ribbon on top of the larger one and then wrapped them round together.


2) When you've finished, feed the ribbon back under itself and tie a knot, cut the excess ribbon.


This has got to be the quickest idea so far, so there is no excuse not to try it! This is it for this week but I'll be putting up the final three ideas next week.

Have a great weekend!

Thursday, November 15, 2012

Jewellery gift ideas part 4 - teardrop necklace


Unique jewellery is such a lovely gift and it's even more meaningful when you have put the time and effort into making it yourself. I love making and receiving handmade gifts, so I thought I would put together a mini series which will hopefully inspire you to whip out your jewellery stash and get creating!

The beauty of each of these ideas is that they are so versatile - you could either make them just as I suggest or simply use each of the tutorials as a springboard to that perfect gift.

Already made: Vintage inspired pearl and ribbon necklace, beaded pendant necklace, woven earrings
                               ....................................................................................................................


I don't really own many 'sets' of jewellery, I quite like mixing and matching up different pieces. But sometimes it's nice to be able to pick up a pair of earrings that you know goes perfectly with the necklace you want to wear. Whilst this makes a really pretty set, the earrings or necklace also both hold their own ground so it's up to you which of these you make!


1) To make the teardrop you need to cut 3 pieces of wire. The overall size of pendant will depend on how long the base piece of wire is, so make that first. Either using a round object, your pliers or just your hands gently ease the wire into a curve, cut it to your desired length (plus approx 2cm extra for the eyes).

2) Cut two straight lengths of wire for the sides.

3) Make eyes at each end of all three pieces of wire. You do this by using the flat-nosed pliers to bend 1cm of wire at 90 degrees. Then, using the flat nosed pliers and starting at the end of the wire, gradually bend the wire back towards the 90 degree turn until it forms a loop.


4) Next attach the two straight pieces of wire to the base wire.


5) Take a headpin and add your bead. Trim if if needed and create a eye at the top of the pin


6) Join this to the 'teardrop' using a jumpring.


7) Next either thread a necklace chain through or attach to an earring. You're done! (well you'll need to repeat it if you're making earrings - unless you only want one earring I guess).


Happy Thursday!

Wednesday, November 14, 2012

Jewellery gift ideas part 3 - woven earrings


Unique jewellery is such a lovely gift and it's even more meaningful when you have put the time and effort into making it yourself. I love making and receiving handmade gifts, so I thought I would put together a mini series which will hopefully inspire you to whip out your jewellery stash and get creating!

The beauty of each of these ideas is that they are so versatile - you could either make them just as I suggest or simply use each of the tutorials as a springboard to that perfect gift.

Already made: Vintage inspired pearl and ribbon necklace, beaded pendant necklace

                               ....................................................................................................................


I love these earrings. I actually made a pair using this design years ago but used thin wire instead of thread. They turned out great, so if you wanted to do that I can assure you it works well! But I love this glitter thread, it makes me feel like I'm wearing triangular snowflakes - perfect for Christmas presents :)


1) Cut two lengths of wire and, using the pliers, bend the wire to create a triangle. Wrap wire around in a tight coil to secure the shape. Cut off any excess wire and squish (the technical term) the end flat against the wire with the pliers.


2) Cut a long length of thread and tie a knot around the wire. Keeping the thread taut, begin to wrap around the wire. Every now again wrap the thread over and under the wire to keep it secure.


3) Continue wrapping the thread until you have thickness you wish, then secure the thread with another knot. Cut off excess thread.


4) Finally add a jump ring and an earring.


Such a simple design but very pretty!

Next up tomorrow is a teardrop necklace and earring set...
Related Posts Plugin for WordPress, Blogger...