Image Map

Monday, May 27, 2013

How to make a cake look beautiful when you don't know how to ice...

I love to bake. Very frequently. Which you've probably picked up on if you follow me here or on Instagram...every other photo is something I've made (and probably devoured without much help).

But I can't decorate a cake. Give me a piping bag and I'm lost...so until now I've gone with the 'rustic' look. Yep, think butterfly cakes (although that's how my Nana does her cupcakes so that will always trump any fancy icing) and generally a sprinkling of icing sugar over the top of...anything. So I feel I can stand here and reliably say that if I can make a cake look pretty, then anyone can!


I made this cake for a friend's birthday get together. I figured a birthday cake needs to be properly iced so I delved into Lily Vanilli's Sweet Tooth for inspiration and then took myself off to Lakeland and attached myself to found myself a very helpful sales assistant. We talked through piping tips and I went with the Wilton 2d tip, which is pictured below.


All I can say is this is so ridiculously easy that I can't believe I've only just discovered it! From now on all my cakes will have roses on :)

How to make a rose covered cake:

1) Make up a fairly stiff batch of buttercream (Mine was perfect for the roses on the top but was too soft for adhering the roses to the side of the cake, they just slipped off).

2) Cover your cake with a thin layer of buttercream

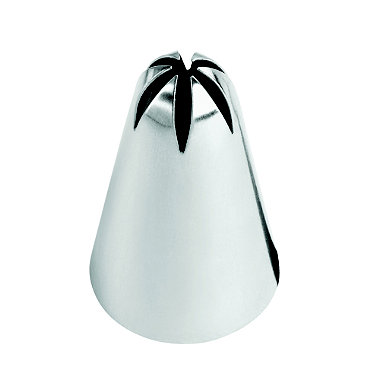
3) Fill your piping bag. For each rose, pipe clockwise in a spiral, starting in the centre and work your way out. Vary up the sizes of the roses and keep layering until all the space is filled.

Tip: If you want to use more than one colour but only have one tip: Make up a piping bag with the tip attached. Then take an additional bag for each colour you want to use and fill these with icing, snip the bottom off of these. Then place one of these bags inside the original (empty) piping bag. Then all you have to do is swap the inner bag when you want to change colours!


Have fun decorating!

Thursday, May 23, 2013

Guest post - How to make an origami bow...

A few weeks ago I introduced you to Esther from Origami-Est. Today she's showing us how to make this gorgeous origami bow!


This is so pretty, I'm planning on making a stockpile for gift wrap!


1. Begin with your sheet of paper patterned side up.
2. Fold paper vertically corner to corner.
3. Unfold. Fold paper horizontally corner to corner.
4. Unfold. Turn paper over and fold diagonally, corner to corner. Unfold and repeat on the other diagonal.


5, 6 & 7. With the patterned side up bring the top corner to the bottom while pushing the side corners into the centre (using pre-creased folds).
8. With the opening at the bottom, horizontally fold the top down (roughly 1cm).


9. Unfold.
10 & 11. Now for the most fiddly part! Refold, using pre-creased lines, with previous fold inserted (as photographed)
12. Fold the top 2 diagonal edges into the centre (aligning the folded edges to the centre fold).


13. Repeat on the reverse.
14. Gently unfold, so there is almost a ‘bubble’ like centre and 4 diagonal indentations coming from the centre.
15 & 16. Hold the paper, so you can see the diagonal folds clearly. Cut along the middle of 3 folds in each diagonal section.


17. Lay the paper white side up.
18 & 19. Taking the lower 2 sections of paper (left and right section, in photo), fold each outside edge into the centre fold.
20. Fold the top section to meet the bottom and turn over to view the patterned side.

21. Cut both sections along the centre fold, all the way to the ‘bubble’.
22 & 23. Turn over. Fold the edges of each bottom piece as desired, these are the ‘tassels’ of your bow and this adds shaped to them.
24. Turn back over. Take the 2 arrow shaped corners, to the left and right of your ‘bubble’ and loop over to tuck the points into the ‘bubble’.


25 & 26. And there you have it! A bow perfect for accessorising gifts!

Thanks Esther! Check her shop for more beautiful paper creations!

Monday, May 20, 2013

Rhubarb and orange cake...

If you come over to our house for dinner you're more than likely to be a guinea pig for at least one new recipe...and our friends were guinea pigs for this rhubarb and orange cake from the May edition of the Good Food Magazine.

This went straight from oven to mouth so there were only a couple of slices left for photos - photos which I took early saturday morning and then proceeded to enjoy cake and icecream for breakfast. It was a good saturday.

I haven't cooked with rhubarb before but a friend gave me some rhubarb from her garden. It was perfect timing as Good Food had all sorts of amazing rhubarb recipes. I settled on this delicious sweet cake!


Ingredients
400g rhubarb, thickly sliced
280g golden caster sugar
225g butter
Finely grated zest and juice of 1 orange
225g self-raising flour
100g ground almonds
1tsp baking powder
3 medium eggs

1) Mix the rhubarb with 50g of the sugar and leave to macerate for 30 minutes.
2) Grease and line a 23cm round cake tin. Preheat the oven to 180 degrees celcius.
3) Tip the remaining sugar, the butter, orange zest and juice into a bowl and mix until well blended.
4) Add the flour, almonds, baking powder and eggs, beat until smooth.
5) Fold in the rhubarb and any juices. Spoon into the tin.
6) I skipped this step but the original recipe recommends sprinkling the top of the cake with a handful of flaked almonds.
7) Bake in the centre of the oven for 1 hour to 1 hour 15 minutes, until a skewer inserted into the centre comes out clean. Cover the cake with foil if it starts to brown too much.

If serving warm leave to cool for ten minutes prior to slicing the cake. It's delicious with custard and ice cream!

Friday, May 17, 2013

And the winner is...


Congratulations Emma on winning the Coral & Stone giveaway! Email me at thebumblingbee{at}hotmail{dot}co{dot}uk for further details on how to claim your prize :)

And for everybody else, don't forget that you can claim 15% discount on any item in the Coral & Stone etsy shop until May 24th, simply use the code CSANDBEE15 at the checkout!

Tuesday, May 14, 2013

DIY shoe makeover...

I often read about how important it is to decide on how much of your personal life you are going to share when blogging.

I have a feeling the before-photo of these shoes should probably have stayed in my private life.


I would just like to state publicly that I do wash my feet. Very regularly :) However my love of going barefoot whenever possible and my inexplicable skill of choosing inappropriate shoes on a rainy day have led to this...let's not hold back now...pretty disgusting outcome!

So here is how I prettied them up!


1) Firstly use the original insoles as templates to sketch out the new soles on the fabric. Cut out and adhere to the soles of the shoes with the strong glue.


2) Next use the craft knife (or stanley knife) to make small cuts along the side of the shoe (mine were about 1.5cm long).


3) Thread the ribbon through the slits, making sure both ends come out at the front of the shoe (that step probably didn't need to be explained!). I found 1m of ribbon for each shoe worked out perfectly.


4) Double knot the ribbon before tying the bow. Then trim the bow ends!


I haven't treated the ends of the ribbon but if you find it frays then holding a lit match close to the edge (briefly) seals it.


I love my new shoes! Here is probably where I shouldn't admit that on their first outing outdoors I got them soaked in the rain - at least all the decoration is replaceable!

Don't forget to enter the giveaway to be in with a chance of winning $40 to spend on any beautiful piece of jewellery by Coral & Stone!


Friday, May 10, 2013

Giveaway with Coral & Stone! (now closed)

I'm really excited to introduce the lovely Coralie of Coral & Stone to you all today. It's not always easy to find designs that are truly original but Coralie's jewellery is both unique and beautiful. I just had to share this find of mine with you!


And, even better, today you're in with a chance of winning an item of jewellery from her shop of your choosing up to a value of $40 (approx £25). First up though I want to share some of my favourite finds!


Just visit the Coral & Stone Etsy shop and comment below with your favourite item. It's that simple!

In addition to the above entry you can gain an extra entry for each of the following (leave a separate comment for each additional entry):

1) Follow The Bumbling Bee on Bloglovin'
2) Like Coral & Stone on Facebook
3) Share the Giveaway on Pinterest 
4) Share the Giveaway on Twitter 
5) Share the Giveaway on Facebook
6) Pin your favourite piece of jewellery from Coral & Stone on Pinterest

This is an international Giveaway and it will run through to 16th May. The winner will be selected at random and will be announced shortly after!

All Bumbling Bee readers can get 15% discount off all Coral & Stone Products until May 24th using the following code CSANDBEE15.

Thank you Coralie for this amazing prize and good luck to you all!

Monday, May 6, 2013

Music for your Monday...

I was going to share a recipe with you today but instead I'm sharing one of the most beautiful songs I've heard of late. I heard it on the Masterchef final so I like to think this post is still slightly related to it's original food theme :)

No it's not the funky music with sounds of perfectly timed chopping of onions and slamming of ovens interspersed throughout - although, obviously, I did love that.

The song is Salvation by Gabrielle Aplin. Her voice is stunning and the piano is so beautiful, this will brighten up your Monday!


Related Posts Plugin for WordPress, Blogger...