Image Map
Showing posts with label recipes. Show all posts

Saturday, April 2, 2016

This Easter...

Warning. A rather self indulgent and, to be honest, boring introduction coming up. But also a tasty cupcake recipe. Skip to the end ;)

Our Easter week kicked off with Jess getting a stomach bug. This was on top of about 6 weeks of illness in our household! But it was okay, the sun was shining so I escaped cabin fever by getting out into the garden and doing some serious pruning (you can just call me The Hacker...seriously, I just love chopping things down!). Then on Wednesday, for a reason unbeknownst to me, I decided that was the day I was going to get fit, so I dusted off my exercise dvds.

Why am I telling you this?

Because Jillian Michaels you are totally getting the blame for what happened next. Turns out, I really shouldn't have exerted myself.

Thursday came and I woke up. Feeling rough (and also pretty achy). Well on top of everything else that was going on at the time (the husband also wasn't very well) a phone call was made. "Mum? (help) What are your plans for Easter (help)? I'm not (help) feeling too good...how do you and Dad fancy coming (help) to cook/clean/get up with Jess spend Easter with us (heeeeeelllllllp!!!)?!"

Tulips that Jessica 'bought' for me. She was happy to show them to me - less keen about actually handing them over!

So what was initially looking to be a pretty downbeat weekend turned into a wonderful Easter with my parents. It was the most restful time that I've had in a long time - we were very spoilt. They did all the cooking and housework and plenty of playing with Jess (of course!). I napped, lay on my bed reading magazines, baked and the loveliest thing of all...spent time with my family.

Mum and Dad took Jess out for the afternoon on the Saturday. I had 3 hours to myself at home for the first time since Jess was born. The pressure was on to make the most of it...so naturally I tried to nap :) When sleep alluded me I decided to bake something I wouldn't normally be able to squeeze into a naptime. I dreamt up a spring bouquet of lemon cupcakes decorated with buttercream roses in pretty pastel colours. The lemon cupcake part went well however, while they were in the oven baking, I realised I had barely any icing sugar! So my 'spring bouquet' became a batch of pink icing and some stingy roses alternated with even stingier thin layers of icing spread on the remaining cupcakes!

But it was fun. And really relaxing. And, most importantly, the cupcakes still tasted great! Lemon cupcakes just feel right for spring time. The fresh flavour matches the freshness of the flowers and greenery springing up around us.

Just out of shot is the lonely cupcake that didn't get any icing...I helped it feel loved by eating it.
Lemon cupcakes - makes 10 cupcakes
adapted from Bake by Rachel Allen

Cake ingredients:
125g unsalted butter, softened
125g caster sugar
Finely grated zest of 1/2 lemon
2 eggs, beaten
150g self raising flour

Lemon butter icing ingredients (the original quantities so you'll have plenty for decorating!):
75g unsalted butter, softened
175g icing sugar, sifted
Finely grated zest of 1/2 lemon
1-2 tsp fresh lemon juice
Milk (optional)

1) Line a muffin tray and preheat oven to 180 degrees Celsius.

2) Cream the butter, sugar and lemon zest until light and fluffy.

3) Gradually add in the beaten eggs, mixing in a little flour if the mixture starts to curdle.

4) Fold in the flour until just combined.

5) Divide the mixture between 10 cases and bake for 15-20 minutes (until lightly golden brown, the cupcakes should be slightly springy to touch)

For the icing:
Cream the butter until very soft. Add the icing sugar and zest, mixing until combined. Add lemon juice to taste and to soften the icing consistency. If the icing remains too stiff for piping then add a little milk.

The lemon icing is really what makes these cupcakes work so don't hold back! I talk about piping roses here if you're not sure how to do this. Roses are such a simple but pretty way to decorate cakes, it's a favourite of mine!

So, here's the real reason for this post. It isn't really to blame Jillian Michaels (but seriously, that's your beginner 30 day shred?!)...or even to share this delicious cupcake recipe. It's to say a massive thanks to my mum and dad for your love and support. You are wonderful and we loved seeing you. Thanks for giving me time to bake and ice cupcakes leisurely!

Monday, March 14, 2016

My week according to food #1

If you read my new year post then you may remember one of my goals was to be more intentional about planning our meals. Since the new year I've been meaning to occasionally share our weekly meal plan - so often when it comes to planning meals, I leave it to the last minute so am always on the lookout for inspiration. During those times I wish I could just be given a meal plan for the week (and maybe a shopping fairy who'll get my food and put it all away for me...and, while I'm at it, why not a cooking fairy and washing up fairy too?). Anyway, in case I'm not alone in having these annoying moments of total mind blanks, I thought I'd share our meal plan (and my opinion of the meals) for the week. Shopping fairy services not included ;)


I think you tend to either be a recipe follower or you don't. Some people just can't seem to stick to a recipe no matter how hard they try...I am not one of those people! I love trying new recipes and find it really relaxing just following the instructions. I mean, I can throw a meal together with various bits we have in the house, but, for me, the enjoyable part of cooking is finding and following new recipes. Plus, if you follow the recipe then you can always shift the blame if the meals turns out to be horrible :)


Inspiration for the week:

- Good Housekeeping Cook's Collection
- GoodFood magazine March 2016
- The Easy Vegetarian Kitchen (although I didn't end up using the recipe from here!)
- BBC Goodfood website
- Pinch of Yum

SO this is what this week's plan looks like:

Sunday

Meal - Chicken roast dinner
Verdict - What's not to love about a roast dinner?!

Monday

Meal - Chicken, leek and mushroom pie  from BBC good food (uses up left over chicken from the roast.)

Verdict - This has been my go-to pie recipe for the last few years...it's simple but so delicious. The flavour is improved massively if you can make the filling up in advance and leave it to cool before making up the pie. I'll often add a pinch of dried herbs to up the flavour further (dried thyme goes well).

Tuesday

Meal - Vegetable lasagne (I was going to use  the recipe from Erin Alderson's The Easy Vegetarian Kitchen but I'm going to contradict what I said up above because I ended up just making it up!)

Verdict - This was so delicious! I used a plain white sauce instead of ricotta and made up a tomato sauce with tinned tomatoes, red onion, balsamic vinegar, basil and a pinch of sugar. I layered these with roasted courgette, aubergine, pepper, onion and mushroom. It's a keeper for us!

Wednesday

Meal - Crockpot carnitas with sweet potato chips, salsa and coleslaw (recipe from Pinch of Yum)

Verdict - The best pulled pork and best slow cooker recipe I've tried to date! I often find both pulled pork and slow cooker meals disappointing (pulled pork often just seems to taste of...pork and slow cooker meals seem to turn out bland). But this had a really great flavour! I don't have a broiler so just popped in the oven for a little while (well I actually forgot about it and left it in too long!) but I'm thinking I won't bother with that next time.

Thursday

Meal - Cod and spinach yellow curry (from March edition of Good Food magazine, although we used haddock)

Verdict - This was great for Jess because it was really mild. It's flavour was nice but a bit subtle for our liking. I would definitely recommend it though for those who are firmly on the mild side of curry :)

Friday - We ate out ;)

Saturday

Meal - Herb crusted cod with warm new potato salad and greens (Cod recipe from Good Housekeeping Cook's Collection)

Verdict - A delicious classic dish and is easy to make in advance.

Now having shared my wonderful week of home cooking I'm off to buy a pizza for tonight, having forgotten to get the meat out to defrost for tonight (and I'm sticking to that excuse!).

Have a great week!

Wednesday, February 17, 2016

Cat cake

Jessica turned 1 earlier this month. Ummm...aaaaargh how has that happened?!! But panic aside, something I was both looking forward to and slightly dreading regarding Jessica turning 1 was making my first birthday cake - all I could picture in my head were all the cake fails that made it onto GBBO An Extra Slice. Now I love seeing those cakes but I didn't want to be creating one in my kitchen. So to Pinterest I went. Of course. The cake I went with was one I had actually saved a couple of years ago...because who knows when you're going to need a super amazing cat cake? Maybe when you're trying to turn your kid into a cat lover from an early age?! The original is by Coco Cake Land and can be seen here. This ended up being finished literally minutes before our family arrived...our house was a mess but we had cake, so I guess I had my priorities right :)


My only other attempt at icing a cake with any panache made me realise that a lot could be achieved with the right piping tip, even with very (very) little experience. This has just reaffirmed that for me...this was seriously easy! I made a four layer victoria sponge cake, sugar biscuits for the ears, butter icing to decorate and ready made fondant icing for the details
 
 
I wasn't able to exactly recreate the fur effect in the original but got a great result using a grass effect tip. I also may have splashed out on a whole set of food colouring gels in order to make cream icing a little creamier ;) But this Wilton set was great for achieving that (it did also make a great pink nose).
 
 
What I learnt -
 
1) Last time I tried decorating a cake the icing was far too soft to stick to the sides. My sister is a fab cake decorator and she recommended using a 2:1 ratio of icing sugar to butter, and then adding a little more icing sugar to achieve a firmer consistency. It worked great although I could have probably gone a little softer (maybe just the 2:1 ratio) and saved some hand ache from pushing the icing through the tiny holes of the icing tip. I think it would have worked fine with any other tip though. I used a regular buttercream icing for the crumb crust which gave the icing a good base to stick to.
 
2) You can do a lot with a regular shaped cake! I think Jess may be having a lot of different animal cakes for her birthdays (this one looks great if I'm brave enough to tackle fondant icing!). However to get a balanced effect I did need to use more layers than normal. Something I didn't take into account when choosing the size of cake tin...so I ended up making a cake that was far too big (Jess looks tiny in comparison in our photos)!! So if you're going high...don't go as wide ;)
 
I was really happy with how this turned out and actually really enjoyed the process...as much as I'm probably going to freak out when Jess turns 2, at least I'll be looking forward to doing her cake!

Monday, March 3, 2014

Raspberry and chocolate rugelach...

One of my favourite cookbooks in my possession is the Smitten Kitchen Cookbook. I have drooled over every page and have loved everything I've tried so far...the flavours are just so good.

I had a bit of a SK lovefest over the weekend and tried out two new recipes. We started the weekend off by having a meal with some friends so first up I made the white chocolate pudding with blackberry curd for dessert. The curd? delicious ( and so quick!). The pudding? So delicious but also really runny - but I don't mind drinking a dessert if it's tasty...thankfully our friends didn't mind either :)

The next morning I woke up to a grey foggy Saturday and had little motivation to do anything other than to stay in my pj's for as long as possible, crafting and baking (and let's face it - procrastinating on pinterest) the day away.

So I made Rugelach.


I had never tasted or even heard of rugelach before but I can attest that they are very very delicious! I had a quick google of them and discovered their name is Yiddish for 'little twists'...I'll be honest, that makes me love them even more. I'm a sucker for cute names...yes, sadly, even for food.

Apparently they are traditionally made with yeasted dough but more commonly these days they are made with a cream cheese dough. I hadn't ever made a cream cheese dough before so I wanted to see how it turned out. I also halved the recipe as it makes a whopping 48 rugelach!

They're so little...and moreish.

Chocolate Raspberry Rugelach (recipe from Smitten Kitchen, quantities adapted)
Makes - 24

Ingredients:
Dough -
115g unsalted butter, at room temperature
115g cream cheese
1/4tsp salt
125g plain flour

Filling -
110g seedless raspberry jam
115g granulated sugar
1/2 tbsp ground cinnamon
40g dark chocolate chips
(original recipe also uses chopped toasted pecans)

Glaze -
1 large egg yolk
1tsp water
Cinnamon sugar (use leftovers from above)

1. First up beat the butter and cream cheese together until light and fluffy.

2. Combine the flour and salt and add to the cream cheese/butter. Beat on a low speed just until the flour is combined. Squash the dough into a flattish rectangle, wrap with clingfilm, and chill for 2 hours.

3. Prepare the fillings. For the jam, heat the jam in a saucepan until it simmers, this thins it out, making it easier to spread. For the cinnamon sugar - combine the sugar and cinnamon in a bowl. Also prepare two baking trays with lined paper.

4. Halve the dough and wrap one half and place it back in the fridge. Take the remaining half and roll out on a well floured surface. Roll into a rough circle about 20-25cm wide.

5. Spread half of the jam over the pastry (go right to the edges), sprinkle over 1-1&1/2 tablespoons of cinnamon sugar and then add a tablespoon of chocolate drops.

6. Use a pizza cutter or knife to cut the dough into 12 wedges (like a pizza). Taking one wedge, roll the outer edge inwards towards the centre. Once rolled up place the rugelach onto a lined baking tray with the pointed end tucked underneath. Repeat with the remaining wedges.

7. Place the prepared rugelach into the freezer for 15 minutes (I just chilled mine in the fridge because of limited space) and preheat the oven to 180 degrees Celsius. Repeat steps 4-7 with the second half of the dough.

8. Brush the rugelach with the glaze (beaten egg yolk with water) and sprinkle over the remaining cinnamon sugar.

9. Bake for about 20 minutes until golden brown. Transfer to a cooling rack while still hot. Allow to cool.

I really love these, I think next time I might omit the chocolate though. They made a great combination but I particularly loved the raspberry and cinnamon sugar together.

I want to try this apricot and walnut variation next :)

Happy Monday!

Saturday, January 11, 2014

Chocolate goo balls...


This recipe is one that will be passed from friend to family to friend to friend to family and so on. Trust me.

I first experienced these little mouthfuls of deliciousness when my sister baked up a cake feast for my nieces dedication party. It turns out she had got the idea from her sister-in-law who'd got them from someone else. But the best bit about these goo balls (aside from the melt in your mouth cake centres) is that you're not left waiting, hoping that your friend will remember to send you that recipe you are salivating over so politely asked for...as they don't actually require a specific recipe.


Yep, that's right! Simply bake up your favourite chocolate cake (although confession time, I actually use a boxed cake mix to save a little time and it still tastes amazing). Whilst it cools make up a batch of cream cheese icing. Then blitz the cake in a food processor to produce cake crumbs and place in a bowl. Gradually mix in the icing until the mixture comes together and you can form balls of cake. Roll the cake mixture into balls (the size is up to you), then simply melt 200g of chocolate and coat the balls ( as you can see I'm not so great at this!). Leave to set on a tray with greaseproof paper.

It turns out that they're basically just giant cake pops...amazing.


The mixture of cake with icing results in a super soft chocolatey mouthful. I can't recommend these enough...seriously, go make them now!

Friday, January 3, 2014

20 Breads: Olive breadsticks...

I know...the first week of January isn't through and I've already started on one of my goals, please don't, no really, oh okay, stand in awe if you really want to :)

Haha, although I need to let you in on a secret, I actually made these for New Years Eve so I suppose technically they don't count but I'm going to count them because I've never made them before and I did eat one on the 1st January.


These are Olive breadsticks and I've been wanting to try them for ages. They are a Paul Hollywood recipe which you can find over at the BBC food website. Lovely airy dough surrounds whole olives to create these really tasty breadsticks. I found that these didn't crisp up like typical breadsticks, this could have been because I made them a little fatter but the dough does seem much more like ciabatta than a typical bread stick.

One word about these, they aren't pretty and they are messy to make! It's a wet dough and it's almost impossible to move it in any uniform fashion. I haven't worked too much with wet doughs so I could definitely do with practising handling it...any tips are welcome!

You can find the recipe here, I halved the quantities and made 18 bread sticks. These are certainly going into my recipe book, they were so delicious with olive oil and balsamic vinegar. If you don't like olives you could easily swap them for something else, e.g. sun-dried tomatoes.

One down, nineteen to go!

Sunday, December 22, 2013

Last minute gift ideas - Hot Chocolate Spoons...

One of my first ever pins on Pinterest were some hot chocolate spoons, I'd never seen them before and they looked such a fun idea. Since then I've seen all sorts of varying ideas for these crop up but I've never got round to making them...until now :)


I love giving little home made presents, last year I made a selection of truffles. Chocolate is always a good option at Christmas (Andrew knows to always shower me in it!) but I wanted to make something different this year so I finally made me some hot chocolate spoons! I've never been organised enough to give wholly homemade gifts but these make a great stocking filler or little additions to gifts.

They're equally great if you're in need of a last minute gift idea as you can source all you need from the supermarket! If you can't find wooden spoons then plastic or metal ones would be equally suitable.


These weren't a last minute dash for me, I actually ordered these spoons in ages ago for a craft event at which we made these exact spoons. When they arrived I realised that the spoons were far too shallow to hold adequate chocolate for a decent hot chocolate (who wants hot milk with a dash of chocolate?)...my friend Lizzie came up with the genius solution of using plastic shot glasses.

Using shot glasses results in delicious ultra-chocolatey hot chocolate, yes I tried them out, quality control and all ;)


Simply melt your chocolate with your preferred method and spoon into a shot glass, add a spoon and decorate with chocolate drops or flakes. You can either keep them simple with one type of chocolate or mix it up by layering or marbling contrasting chocolate.


Once you've finished pop the spoons into the fridge for an hour or until set (they set really quickly).
To remove from the shot glass simply dip each spoon into a cup of hot water for a couple of seconds, this should melt the chocolate sufficiently to remove from the glass without ruining the design.

Then pop into a plastic bag and decorate with a label and instructions!


Some practical notes: I got 4-5 spoons per 200g chocolate. Also, two of my chocolates split as I pulled them out of the glass. I'm not sure why this happened but it could have been because I was a little late in adding the spoon to the melted chocolate for these ones. If this happens, don't despair! Simply heat up a metal spoon in hot water, dry and rub over the inside of the chocolate, stick back together and then run the spoon over the seam to secure it back together and leave to set.

I used a range of milk chocolate, dark chocolate, white chocolate and orange chocolate (I was thinking of a Terry's Orange in a mug, oh yum). My test spoons were made with cheap chocolate, I nearly always use Value chocolate for baking, Sainsburys and Tescos are both really great and you can hardly ever tell with cakes etc...but I would advise on good quality chocolate for these drinks as you can definitely taste the difference.

This is probably it now for me before New Year...I did have plans to post about some pretty wrapping ideas but I'm working right up to Christmas and frantically finishing wrapping the rest of the time...so I'm going to be realistic and wish you all a Merry Christmas now! I hope you all have a wonderful Christmas with loved ones and build some truly fun and joyful memories as this year draws to a close.

Merry Christmas!


Monday, October 28, 2013

Marshmallow and ginger cake...

I have managed to get so behind with my little blog! I have lots of craft projects to share with you but I just can't seem to find the time at the moment to sit down and write a post! Life feels a good sort of busy though, I have just started to attend some lectures run by my husband's college so much of the time I would usually set aside for blogging is currently spent reading for those instead. So bear with me, things might be a little quieter around here for a while...or, more likely, my house will be neglected so that I can do the much more fun task of blogging instead of, say, the washing up :)

Anyway, I'm pretty sure you didn't click on 'marshmallow and ginger cake' to hear all about my busyness...so let's talk cake.


I went round to a friend's last week to watch the final of Great British Bake Off. I have a confession, this is the first bake off that I have watched. I am so ridiculously bad at following a series but I finally managed this year! Of course, it would be completely wrong to watch the final without eating cake...right? I had seen this gorgeous recipe in my latest Good Food Magazine which I knew would be perfect for such an occasion :)

My photo really doesn't do it justice, the marshmallow icing in the magazine has been toasted with a blowtorch and...it has sparklers coming out of it - so amazing! I searched for an online version of it but there isn't one on their website so you'll have to make to with the photo of my version!

The only significant changes I made to the recipe was to make the butter icing less gingery by excluding the stem ginger and syrup that they recommended. It resulted in a lightly spiced sponge and icing balanced with the sweetness of the marshmallow icing (which is really meringue not marshmallow)...it's a keeper for me!


Toasted Marshmallow and Ginger Cake (from Good Food magazine Nov 2013)

For the cake:
100g butter or margarine
100g soft dark brown sugar
100g black treacle
140g golden syrup
225g plain four
1 tsp bicarbonate of soda
2tsp ground ginger
1tsp ground cinnamon
1/2tsp salt
125ml whole milk (I used semi-skimmed)
3 medium egg yolks (keep the egg whites for the icing), whisked.

Preheat the oven to 160 degrees Celsius and line a 2lb loaf tin.

1. Melt the butter, sugar, treacle and syrup in a saucepan, whisking continually until smooth. This will only take a couple of minutes. Set aside to cool for 10 minutes.

2. Mix the flour, bicarb, ginger, cinnamon and salt together into a bowl. Pour in the warm syrup mixture, milk and the egg yolks, whisking until well combined and smooth.

3. Pour into the tin and bake for 50-60 minutes, until a skewer comes out clean.

4. Leave to cool in the tin for 30 minutes and then use a sharp knife to slice of the top (to give an even surface) and transfer to a wire rack to cool completely.

For the ginger butter icing:
140g butter, softened
200g icing sugar, sifted
1/2tsp ground ginger
(optional, add 4 balls of stem ginger, finely chopped, and 1tbsp ginger syrup to stay true to the original recipe)

1. Combine all the ingredients in the bowl and beat until smooth.

For the marshmallow icing:
3 egg whites
175g caster sugar

1. Put the egg whites, sugar, 1tbsp water and a pinch of salt into a heatproof bowl. Place this over a pan of boiling water (keeping the base of the bowl away from the water). Whisk (I suggest an electric whisk to save your wrists!) together over the heat for about 4 minutes or until the meringue reaches the ribbon stage - this is where the whisk will leave a trail that remains visible for at least 3 seconds.
2. Take off the heat and continue to whisk for a further 3 - 4 minutes until the icing has cooled slightly and stiffened.
3. Transfer 1/3 of the icing to a piping bag fitter with a large round nozzle.

To assemble:
Slice the cake into 3 layers (lengthways). Using the widest layer as the base, reassemble the cake spreading the buttercream evenly between the layers.
Next cover the outside of the cake with a layer of marshmallow icing. You can use a palette knife to draw vertical lines up the cake sides.
Take the piping bag and pipe spikes of meringue over the top of the cake.
At this point, if you have a cook's blowtorch, you can lightly toast the meringue - sadly I don't have one of these yet!

It went down a treat :) What did everyone think of the final? I was cheering on Frances so I was happy that she won! They were all so good but her creations were always just so beautiful, and she seemed really down to earth...I guess she proved Paul wrong with the whole boring business of 'style over substance' :)

Happy Monday! Stay safe if the storm reaches you.

Tuesday, September 24, 2013

Viennese fingers...

I remember when I was little standing in awe of the bakery section in the supermarket...I mean, all those cakes! When I was small I would always go for the meringue (which if I remember rightly was in the shape of a mouse), but as I grew older I veered for something even sweeter and sicklier than a meringue...Viennese fingers. With their soft buttery biscuit dipped in chocolate sandwiching a thick layer of buttercream...well it was perfect my uber-sweet tooth.


I decided last week that it was time to bring these bad boys to my kitchen. We were having a leaving lunch at work so it was the perfect time to whip up a batch of these sweet delights from Rachel Allan's Bake book. She suggested pairing them with either butter icing or buttercream icing. Since I had never made buttercream before I decided to have a go at that. Whilst it was really tasty, I found the buttercream melted really easily so I would suggest considering butter icing if you're going to be transporting the biscuits around! 

Another note: the biscuit dough was much stiffer than a previous recipe I had tried so you will need a pretty big piping nozzle to pipe it onto the trays (she suggests 1-1.5cm). I attempted with my largest nozzle but ended up just cutting a hole in my piping bag to enable me to pipe!

Viennese fingers (from Bake)

Ingredients -
110g butter, softened
50g icing sugar
1 egg yolk
1 tsp vanilla extract
150g plain flour
25g cornflour
Pinch of salt
For the buttercream icing -
75ml milk (I used semi-skimmed)
65g caster sugar
1 egg yolk
85g butter, softened
1/2tsp vanilla extract

1) Preheat the oven to 180 degrees celcius and line a baking tray.

2) Cream the butter in a bowl until soft. Sift in the sugar and beat until the mixture is light and fluffy.

3) Beat in the egg yolk and vanilla extract until combined.

4) Sift in the flours and salt and beat until a combined.

5) Spoon the dough into a piping bag and pipe the biscuit onto the tray in small fingers. Bake for 12 - 15 minutes, until pale golden brown. Leave to cool for 2 minutes and then transfer to a wire rack to cool completely

*This is where I 'fess up and admit I totally forgot about my biscuits when they were in the oven, they got way over 15 minutes, but nothing a bit of trimming of the ends could fix! They were still so soft to eat :)*

6) To make the buttercream icing: Add the milk and sugar to a saucepan and bring  to a gentle boil, stirring to dissolve the sugar. Whisk the egg yolk in a small bowl and pour the milk onto the yolk, whisking continuously. Return the mixture to the pan and heat over a low-medium heat for about 10 minutes, or until the custard thickens (it should coat the back of a spoon). Stir continuously. Make sure the heat isn't too high or the custard may curdle. Set this aside to cool slightly. Meanwhile whisk the butter in a bowl until soft and light. Gradually pour in the cooled custard, whisking throughout. Add the vanilla extract and whisk to combine.

7) Melt 100g chocolate and dip one end of each finger into the chocolate, using a knife to neatly spread the chocolate on the biscuits. Leave to set on a wire rack.

8) Next sandwich the fingers together with the icing (you could also add a thin layer of jam).

This recipe made 7 paired Viennese fingers.

Happy Tuesday!


Thursday, September 12, 2013

Make your own chocolate cups...

I made these right back at the beginning of August...we had just got back from a long drive home after holiday and felt in need of a chocolate pick-me-up. I've wanted to make chocolate cups ever since seeing this delicious looking hot chocolate on Pinterest...however I settled on filling mine with the slightly more practical option of chocolate mousse!


For 2 chocolate cups:
1. Melt 100g white chocolate, set aside.
2. Blow up two balloons to the desired size (keep them small to maintain the bowl shape)
3. Dip the balloons repeatedly into the melted chocolate to build up the chocolate shell.
4. Set onto a lined tray/plate and chill until set.
5. Pop the balloon and gently pull away from the chocolate shell.


I filled mine with far too much chocolate mousse (well it was fine for me but my husband doesn't have the same skill in packing away chocolate!). I used a super easy recipe from The Big Book of Chocolate...

Ingredients:
1 egg white
5tbsp caster sugar
100g dark chocolate
125ml double cream

1. Melt the chocolate and set aside to cool
2. Whip the cream to soft peaks
3. In a separate bowl whisk the egg white until the soft peak stage. Gradually add the sugar, continuing to whisk until the peaks are thick and shiny.
4. Use a metal spoon to fold in the chocolate and cream.
5. Divide between the two cups and refrigerate for 30 minutes before devouring serving.

I hope you enjoy having a go at your own chocolate cups!


Tuesday, August 6, 2013

Blueberry Cake...

This is one of our all time favourite cake recipes (and we eat a lot of different types of cake!). It's become a little tradition for me to make this for Andrew for his birthday. It still feels right though to try to hide any evidence of the cake while I'm making it eeeeven though he blatantly knows what I'm making him! For his birthday a couple of weeks ago we had some friends over for a bbq. I know meat is the main deal at a bbq but I firmly believe you always need a good pudding, so I made this and Eton mess to finish up the food.


I had plans to take lovely photos of this cake. But then prep for the bbq happened...and then it was far more fun to spend time with my friends...and then, it was time to eat cake! And this cake got demolished so quickly - so I only have my instagram images to share! But this recipe is so tasty I just can't justify not sharing it with you purely because i don't have a fancy photo :) I included the top photo to give you a hint of what to expect the cake to look like once baked, but the photo below shows just how pretty it is once the icing has been added!


Blueberry cake (from The Hummingbird Bakery Cookbook)

Ingredients -
350g unsalted butter
350g caster sugar
6 eggs
1tsp vanilla extract
450g plain flour
2tbsp + 2tsp baking powder
280ml soured cream
250g fresh blueberries (plus extra to decorate)

For the icing -
600g icing sugar, sifted
100g unsalted butter
250g cream cheese

1x 25cm ring mould, greased.

1) Preheat the oven to 170 degrees Celsius.

2) Cream the butter and sugar together until light and fluffy

3) Add the eggs one at a time, mixing well between each addition.

4) Add the vanilla extract, flour and baking powder and beat until well incorporated.

5) Add the soured cream and mix until combined and the mixture is light and fluffy.

6) Stir in the blueberries and transfer the mixture to the cake tin. I think my tin is a bit smaller than 25cm, it does rise so leave space for this (the extra mixture made us 4 tasty cupcakes!).

7) Bake for 40 minutes or until golden brown. Leave the cake to cool slightly in the tin prior to turning out to cool completely on a wire rack.

8) Once cool, cover with the icing, sprinkle over the blueberries and a light dusting of icing sugar.

To make the icing -

Beat the icing sugar and butter together until well mixed. Add the cream cheese and beat until the icing is light and fluffy. It recommends beating it for at least five minutes but be careful because over beating causes the icing to become runny.

Enjoy!

Tuesday, July 23, 2013

Homemade lemonade...

In 2007 I was lucky enough to get the chance to travel around Europe during my summer break from uni. It was a glorious summer, spent exploring new cities and countries, from the beautiful coastline of Croatia to the mountain range of Slovakia to the vibrant square of Brussels. It was such a fun time spent with friends and it's something I will always treasure. But hours spent on (un-air conditioned) trains and wondering around in the searing heat with our backpacks while we attempted to find our latest hostel certainly worked up a thirst (and also an overwhelming need for ice cream. a lot of ice cream). Nothing quenches my  thirst like freshly made lemonade. I literally lived on the stuff. And because of the wonderful way our senses like to help memories linger, whenever I take a sip of 'limonata' now, it never fails to bring me back to fun memories and the relaxed feeling of being on holiday. I drank gallons of it (slight exaggeration) while we were in Croatia last year, and, now that Summer has finally arrived in the UK, I'm relishing squeezing my lemons again!


I adore 'intense' lemonade (if such a thing exists) because of my strange love of the sourness of citrus fruits - if it doesn't contort my face into all sorts of strange shapes then it's too sweet. Whilst I hardly ever add in sugar, it does give this drink a lovely sweetness to cut through the sour lemon. If you prefer it a little weaker or want the lemons to go further you can add up to 1l of water to 4 lemons.

Recipe (serves 2)
4 lemons
400ml water
Sugar to taste

Squeeze the juice of the lemons and mix with the water. Stir in sugar to taste. Serve with ice.

And there, my friends, you have my ultimate Summer drink - Happy Tuesday!

Monday, May 27, 2013

How to make a cake look beautiful when you don't know how to ice...

I love to bake. Very frequently. Which you've probably picked up on if you follow me here or on Instagram...every other photo is something I've made (and probably devoured without much help).

But I can't decorate a cake. Give me a piping bag and I'm lost...so until now I've gone with the 'rustic' look. Yep, think butterfly cakes (although that's how my Nana does her cupcakes so that will always trump any fancy icing) and generally a sprinkling of icing sugar over the top of...anything. So I feel I can stand here and reliably say that if I can make a cake look pretty, then anyone can!


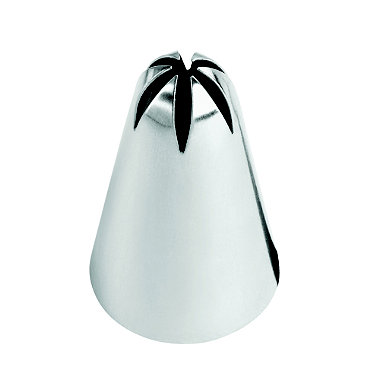
I made this cake for a friend's birthday get together. I figured a birthday cake needs to be properly iced so I delved into Lily Vanilli's Sweet Tooth for inspiration and then took myself off to Lakeland and attached myself to found myself a very helpful sales assistant. We talked through piping tips and I went with the Wilton 2d tip, which is pictured below.


All I can say is this is so ridiculously easy that I can't believe I've only just discovered it! From now on all my cakes will have roses on :)

How to make a rose covered cake:

1) Make up a fairly stiff batch of buttercream (Mine was perfect for the roses on the top but was too soft for adhering the roses to the side of the cake, they just slipped off).

2) Cover your cake with a thin layer of buttercream

3) Fill your piping bag. For each rose, pipe clockwise in a spiral, starting in the centre and work your way out. Vary up the sizes of the roses and keep layering until all the space is filled.

Tip: If you want to use more than one colour but only have one tip: Make up a piping bag with the tip attached. Then take an additional bag for each colour you want to use and fill these with icing, snip the bottom off of these. Then place one of these bags inside the original (empty) piping bag. Then all you have to do is swap the inner bag when you want to change colours!


Have fun decorating!

Monday, May 20, 2013

Rhubarb and orange cake...

If you come over to our house for dinner you're more than likely to be a guinea pig for at least one new recipe...and our friends were guinea pigs for this rhubarb and orange cake from the May edition of the Good Food Magazine.

This went straight from oven to mouth so there were only a couple of slices left for photos - photos which I took early saturday morning and then proceeded to enjoy cake and icecream for breakfast. It was a good saturday.

I haven't cooked with rhubarb before but a friend gave me some rhubarb from her garden. It was perfect timing as Good Food had all sorts of amazing rhubarb recipes. I settled on this delicious sweet cake!


Ingredients
400g rhubarb, thickly sliced
280g golden caster sugar
225g butter
Finely grated zest and juice of 1 orange
225g self-raising flour
100g ground almonds
1tsp baking powder
3 medium eggs

1) Mix the rhubarb with 50g of the sugar and leave to macerate for 30 minutes.
2) Grease and line a 23cm round cake tin. Preheat the oven to 180 degrees celcius.
3) Tip the remaining sugar, the butter, orange zest and juice into a bowl and mix until well blended.
4) Add the flour, almonds, baking powder and eggs, beat until smooth.
5) Fold in the rhubarb and any juices. Spoon into the tin.
6) I skipped this step but the original recipe recommends sprinkling the top of the cake with a handful of flaked almonds.
7) Bake in the centre of the oven for 1 hour to 1 hour 15 minutes, until a skewer inserted into the centre comes out clean. Cover the cake with foil if it starts to brown too much.

If serving warm leave to cool for ten minutes prior to slicing the cake. It's delicious with custard and ice cream!

Thursday, April 11, 2013

Chocolate caramel melts...


Don't you love it when something great comes about unexpected? Typing that sentence makes me feel like I should follow that statement up with a profound story of self discovery...but I'm actually just going to talk about my discovery of these chocolate caramel-melt-in-your-mouth little morsels of deliciousness. 

These were originally going to be centres for some truffles - but then my truffle mixture didn't set. Which turned out not to be such a bad thing because 1) these were the end result, and 2) Andrew and I got to eat about twenty truffles worth of rich chocolate ganache for pudding that night.

Ingredients:

20g butter
40g light brown sugar
3tbsp golden syrup
35ml double cream
50g good quality milk or dark chocolate - this would work great with Cadburys!

Method:

1) Place all ingredients except the chocolate into a saucepan and place over a high heat. Bring to the boil and boil for 2-4 minutes, stirring regularly, until the sauce has thickened.

2) Add the chocolate and remove from the heat, stir until the chocolate has melted and combined.

3) Line a plate or tray with clingfilm and lightly oil the surface. Spread the mixture evenly across the plate and cover with clingfilm.

4) Place in the freezer for 1 hour (or until set). Use a small cookie cutter to cut out discs to your desired size!

Thursday, March 28, 2013

Guest post - Blueberry Days

I'm really excited today to introduce Meike from Blueberry Days to you lovely people. She has popped over to give us an amazing recipe for making our own Easter Biscuits...

------------------------------------------------------------------------------------------------------------

Hello The Bumbling Bee readers! I hope you like Easter as much as I do because I made something special for the occasion to share with you. The first flowers are blooming, the sun is coming out, bunnies are giving out chocolate eggs and everybody is getting into the Spring mood. Well, unless it’s freezing cold and chocolate only serves as comfort food against the winter. To make up for the lack of sunny days and colourful blooms I have made some Easter biscuits with Spring coloured icing. You should try them! They really lift the mood!


Ingredients: 100g butter - 100g sugar - 1 medium egg - 275g plain flour - 1 tsp vanilla extract
Icing: 400g icing sugar - water - food colourings
 
Mix together the butter and the sugar until creamy. Stir in the egg and vanilla extract. Now add the flour. Knead everything together until you have a smooth dough ball.

Roll out the dough on a lightly floured surface (between 5mm and 1cm thick) and start cutting out the biscuits. Place on a baking paper lined baking tray.


Bake for about 6-9 minutes (depending on how thick you have rolled out the cookie dough) until the biscuits are starting to brown slightly. Let them cool on a wire rack.


To make the icing sugar, pour one tablespoon of water into a small pot and gradually add teaspoons of icing sugar, don’t forget to beat it all together between the icing sugar additions. You don’t want the icing sugar to be too watery as it won’t dry properly otherwise, but you don’t want it to be too thick either as it will not spread as nicely. Add food colouring until you have your desired colour in the pot. Using a knife, spread the icing onto the cold biscuits and let them dry for a while. If you want to add sprinkles, add them while the icing sugar is still wet.


Enjoy and hopefully see you on my blog Blueberry Days some time! xo, Meike

---------------------------------------------------------------------------------------------------------------------------
Thanks Meike, these look so tasty! 
Happy baking :)

Monday, February 4, 2013

How to make your own: pomegranate molasses

Once upon a time I experienced a salad which eclipsed all salads that I had ever eaten or, in fact, have ever eaten since. In fact I didn't know salad could be so delicious. Now there's a chance that over the course of three years since eating said salad that my memory has slightly exaggerated my tasting experience but trust me, it was good!

There's just one problem.

I have no idea what made it so good.

It was made by someone I worked with for only a very brief amount of time and all I knew was that the dressing was made using something her boyfriend had brought back from visiting relatives in Lebanon.

Well guys, I think I now know what that something is...pomegranate molasses! Oh I'm so hoping it is so that I can recreate the delicious mouthwatering salad that I would almost give up chocolate (but not fresh bread) for. Wow in writing that sentence I just realised that I really would prefer to give up chocolate over fresh bread...although that might purely be because my sugar cravings have just been satisfied with a giant cookie or three.

Anyways...back to pomegranate molasses. In my January subscription of Good Food, there was an intriguing recipe for sweet and sour ribs in which pomegranate played a dominant role. Whilst we weren't completely overwhelmed by the end results (my quest for the perfect ribs continues...so please send any favourite recipes you have my way!), I loved the pomegranate molasses recipe that they supplied alongside the rib recipe. So I thought it would be mean to not share this delicious syrupy goodness with you :)

If you're wondering what pomegranate molasses are or how you might be able to use it then there's a great article over at Food 52 which has some great recipe ideas (including a salad dressing!).


Homemade pomegranate molasses
Source: Good Food Magazine (Feb 2013)

Ingredients
800ml pomegranate juice
Juice of 1&1/2 lemons
5tbsp caster or granulated sugar

Method
1) Add all ingredients to a deep frying pan over medium-high heat

2) Bring to the boil and simmer until the sugar has dissolved and the liquid has reduced to a syrup consistency, The original recipe suggest this will take 15 minutes but I found it took about 30 minutes. It will yield approximately 175ml syrup. Keep an eye on the mixture as if you over boil it, it will thicken up quickly and burn.

It is such a simple recipe and I found it a lot easier than trying to find the bottled version in my local shops :)

I'm off to try to recreate that long dreamt of salad...Happy Monday!

Wednesday, January 9, 2013

Spiced Chilli Popcorn...

This time last year we had no idea where we would be living or what we would be doing...it's amazing how much has changed in the space of 12 months. We now live in a really pretty town and feel so blessed by the wonderful friendships we have already made. I haven't been working since we moved back in September and my husband is officially a full time student again...so life has been pretty different to the usual routine of the last couple of years.

It's been amazing to have had the last few months to settle in but I'm looking forward to working again soon. I've been waiting to hear about a job for a while now and today I finally got a start date....and it's only a couple of weeks away! I'm actually really excited about starting back at work, I love what I do (I'm an occupational therapist) and I think it's going to help me use my time so much more productively. I don't know about you guys but I seem to get more productive when I have less time to do things!

One thing I have loved though is the extra time in my kitchen. Really, I just love being around food! I hate cooking and shopping when it's squeezed into a tight schedule and for ages I have been wanting to plan our weekly meals but it would always end up being a 1 minute think while checking the cupboards. But now I have the time to have a cuppa while browsing my cookbooks and the internet for inspiration. Then I trot off down to the supermarket (at a time when most people are working, thank you) and actually enjoy mooching around the aisles!

One of the down sides of having so much time in the kitchen has been my close proximity to food throughout the day. I'll graze on anything that's in the cupboards so I've been trying to find some healthy snacks to keep me going. I thought I'd share this delicious savoury popcorn I tried and loved and am in fact eating as I type!


I've never been convinced by savoury popcorn, mainly because I love sweet popcorn. but making up a load of sweet popcorn would kind of defeat my aim of a healthy snack (but melting golden syrup over a bowl of popcorn is seriously amazing). But this recipe has converted me....so here it is:

Spiced Chilli Popcorn
Source: Good Food

Ingredients:
100g popcorn kernels
1tsp chilli flakes
1tsp cracked black pepper
2tsp mixed spice
A pinch of salt

(For snacks just for 1 person I'd suggest quartering the amount of each ingredient!)

1) To make the popcorn, simply heat up 1tbsp of oil over a medium heat. once the oil is hot, add the kernels and the pan's lid. Shake well to cover the kernels in the oil. Continue to occasionally shake once the popping begins and remove from heat once the popping stops.

2) Mix together the chilli flakes, mixed spice, pepper and salt. Add to the popcorn and mix well.

3) Tip the popcorn onto a large baking tray and pop into the oven for 5 mins until the popcorn is crisp.


I would love to try some more savoury ideas...what are your favourite popcorn flavours?

Wednesday, December 19, 2012

Cinnamon sugar biscuits...

This year we're planning on giving out homemade sweets (I'm hoping my family don't make it on  here to read this before Christmas!) so I spent this morning playing in the kitchen trying out various sweet recipes. My husband was in truffle heaven as he was the official taste tester for each flavour (I was the official 'lick the bowl'er). Candied citrus peel = fail but honeycomb truffle = amazing! It 's the first time I have ever made honeycomb, I can't believe how simple it was - I used this recipe if you're interested in trying it out yourself. I'll share the truffle recipe once I have perfected it :)

Whilst I don't have any truffle recipes to share yet, I had to share these delicious biscuits from Cake Days. I had never heard of snickerdoodles but they are full of cinnamony cakey goodness. These are going to be on hand for our night of present wrapping.


Ingredients:
60g unsalted butter
160g caster sugar
1/4tsp vanilla essence
1 large egg
240g plain flour
3/4tsp cream of tartar
1/2tsp bicarbonate of soda
1/8tsp salt
1/4tsp ground cinnamon

For coating:
1 1/2tbsp caster sugar
1tbsp ground cinnamon


Method:

1) In a large bowl, cream together the butter and sugar until light and fluffy.Add the egg and vanilla essence, mixing until well combined.

2)Sift together the remaining ingredients and gradually add to the mixture until the dough comes together, forming a smooth ball. Place in bowl, cover with clingfilm and chill for 40 minutes.

3) Preheat the oven to 170 degrees celcius (325 F) and line two baking sheets.

4) Mix together the sugar and cinnamon for the coating. Break off walnut-sized pieces of dough, roll in the coating and place on the baking sheet. I found these didn't spread much during baking so flatten slightly with the palm of your hand.

5) Bake until they are light golden, approximately 10-15 minutes. Leave to cool for 5 minutes and then transfer to a wire rack to cool completely.

Enjoy!

Wednesday, October 10, 2012

Sometimes you just need cake NOW...

I had high hopes of my use of my free time since our move. I imagined a metamorphosis into a domestic goddess, filling our home with the aroma of fresh bread daily and waking to spotless surfaces. It turns out moving to Cambridge hasn't changed my detest of washing up or my skills at procrastination. Instead of baking that bread I have watched far far too many CSI and Ace of Cakes episodes (although I'm going to classify the latter series as 'research').

I also thought it would mean I would never run out of cake again, With all that free time I thought I'd be baking away. However, I have no idea how...but it happened. I wanted cake. I went to the cupboard. IT WAS EMPTY. Let's face it, we all have cake emergencies. times when you need that fix way sooner than it takes to whip up a beautiful victoria sponge...and definately sooner than it takes to wait for the cake to cool before icing... I decided a long way back that I'm happy to settle for slightly melted icing :)

That's why everybody should have a staple fridge cake recipe to hand. I grew up with chocolate praline cake...it should be illegal for a cake to be so utterly delicious with so little work. But if even this super quick cake is taking too long for your liking, whack it in the freezer to set the chocolate in minutes. come on, we've all been there.


Ingredients
4oz / 110g butter
2tbsp golden syrup
2 heaped dsp drinking chocolate
2 handfuls sultanas
8oz  / 225g digestive biscuits
9oz / 250g milk chocolate, melted

1) Crush the digestive biscuits to your desired texture. I don't crush it right down as I like to have some crunchy bits in my cake...but that's really up to you. Set to one side.

2) Melt the butter and syrup in a pan. Make sure you lick any remaining syrup from the spoon (this is a very important step).

3) Once melted stir in the drinking chocolate, biscuits and sultanas. Mix until well combined.

4) Press into a greased 11" x 7" tin and pour the melted chocolate over the mixture.

5) Refrigerate until set.

This is a great base from which to experiment, why not change up the sultanas with different dried fruit...or add in some fudge for a less innocent snack :)

Happy Wednesday!

Related Posts Plugin for WordPress, Blogger...