

Every now and again I'll try to cleanse my hoard but I can never throw jars away...they have so much potential and there's far too many pretty ideas on Pinterest. Here's a few ideas of how to make your own hanging jars...these are currently in my lounge but I can't wait until summer so that I can use them outside for those late night Summer barbecues :)

I used 0.8mm wire because that is what I had to hand. It wasn't as strong as I would have liked so I simply doubled the wire in the handle. If you have stronger wire then skip step 1 and just cut the length of wire you would like for the handle + 4cm.
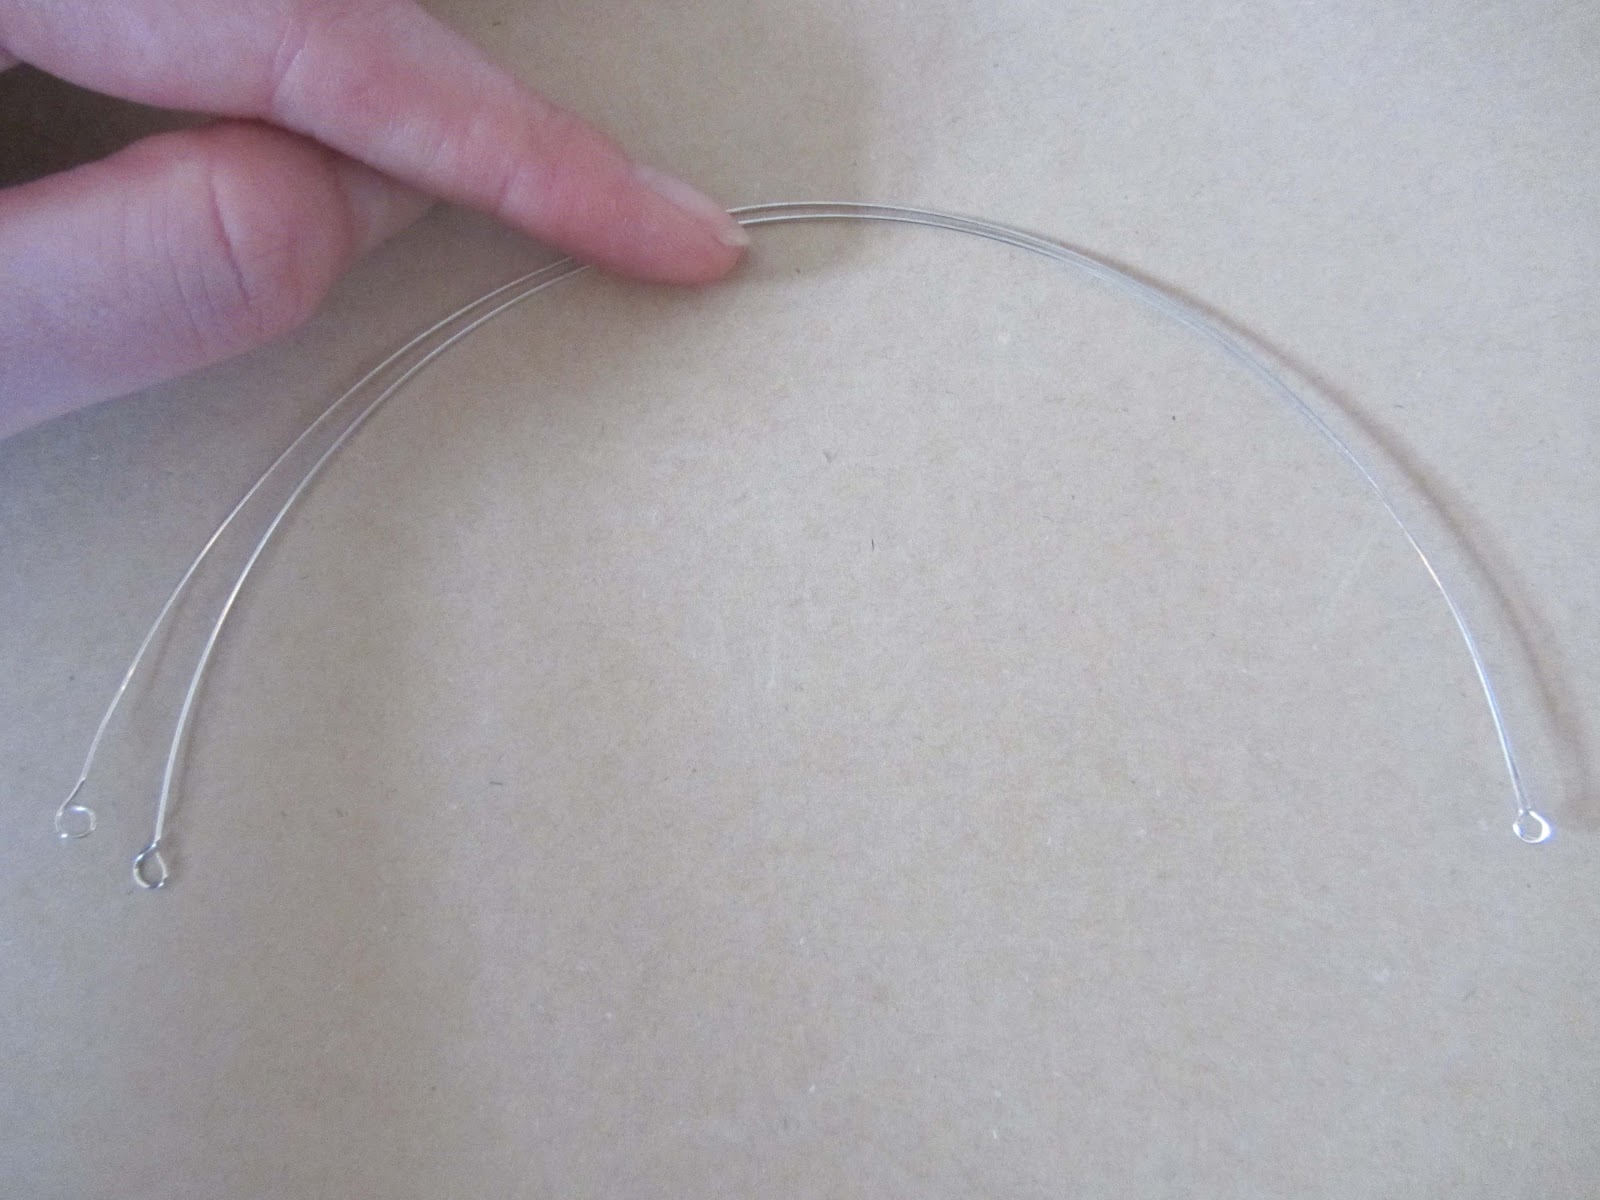
1) Firstly measure how long you would like the handle to be, then cut double this length + a little extra (approx 4cm) of wire. Bend the wire in half.

2) Next you need to create an 'eye' at each end of the wire. To do this, take one end of the wire and bend 2cm at 90 degrees (using flat-nosed pliers). Next, using round-nosed pliers, create a loop - starting at the end of the wire and working into the bend.

3) Now feed both ends of this wire onto the remaining wire and position around the top of the jar. Wrap the wire repeatedly around the top of the jar. Once secure, twist the wire around itself and, after trimming the ends of the wire, flatten the ends against the jar.


I love it paired with lace and ribbon...

To attach, I simply cut the length required and added a thin line of strong glue to hold the lace in place - secure with tape until dry. Then tie a pretty bow...my mum taught me how to tie the perfect bow when I was making my wedding invitations - it would seem tying 100 bows with this method wasn't enough repetition to embed it in my memory!
We've got a bit of a red and gold thing going on here for Christmas so I thought I'd make a jar to match...

For this I wrapped gold raffia (left over from the hanging stars) around the handle before threading the handle onto the base wire. Then I added some extra raffia to hide the wire and secured with a knot.
Then I got a bit bored with wire so I decided to have a go with twine.

Then I got a bit bored with wire so I decided to have a go with twine.

For this, simply tie a strand of twine tightly around the top of the jar. Loop over the top and feed under the twine wrapped around the jar. Secure with a knot and trim the excess twine.


For the fourth, I just really wanted to use some of the cute Christmas ribbon I had lying around. For this, and the red and gold jar, I decided to just use a little sellotape to secure the ribbon so that I had the choice to change them after the Christmas season had passed!
I think these would make really lovely gifts, so if you're running out of time (like me, how is Christmas only a week away?!) then this is a really simple but pretty present idea.
Note: the wire handles get very hot when a tealight is lit in the jar and it is not recommended to light a candle in jar if hanging with twine or paper wrapped wire as these present a fire risk.
Happy Monday!
very sweet, you could put the little flickering battery operated lights in so there'd be no fire risk, then you could also put the lid on in case of rain or snow
ReplyDeleteI like all the different ways you've decorated these
http://ahandfulofhope.blogspot.co.uk/
so simple yet really beautiful! well done :) pretty blog by the way.
ReplyDeletehttp://sweet-ingenuity.blogspot.com