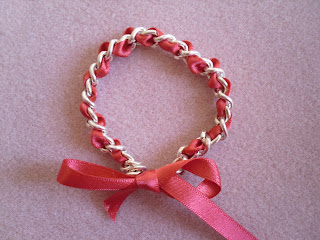
But for now, I thought I'd share a pretty bracelet I recently made. I figure you can never have too many bracelets...and if you do, here's an idea for a gift!
I love the combination of the chain and the soft girly ribbon. This took me 15 minutes top...and 5 of those minutes was spent trying to pull one of the chain links apart with an industrial pair of pliers to get the right length. (I did this first thing in the morning and was not quite prepared for that unexpected work out)
What you need:
Quite simply a strand of ribbon and a piece of chain. You want the chain to be slightly short of your wrist measurement so that there's space to tie the bracelet.
1. Weave the ribbon through each link of the chain. It's worth taking time to make sure that the ribbon doesn't twist.
3. You'll probably find the end of the ribbon gets a bit frayed after weaving it through so simply trim by cutting it diagonally .
Now if only summer would remember us again so that I can accessorise this with a pretty summer dress :) (only another 8 months to go)


No comments:
Post a Comment